Popular Posts

Total Pageviews

Categories

Archives

how to install windows quickly or save your time while installing new windows

TRICK TO SAVE YOUR TIME WHILE INSTALLING WINDOWS
  • Boot through Windows XP CD.
  • After all the files are completely loaded, you get the option to select the partition. Select “c”.
  • Now Format the partition, whether it is normal or quick with NTFS or FAT
  • Once the formatting is completed, All the setup files required for installation are copied.Restart your system by pressing Enter.Now, here begins the Simple trick to save 10-15 minutes.
  • After rebooting, you get a screen where it takes 40 minutes to complete or finalize the OS installation.
  • Now, Press SHIFT + F10 Key -> This opens command prompt.
  • Type “Taskmgr” and press enter. This will open Task Manager.
  • Click the Process Tab, here we find a process Setup.exe. Right Click on Setup.exe and Set Priority -> Select High or Above Normal. Initially it will be Normal

how to enable DISQUS COMMENT BOX in blogger or how to use DISQUS COMMENT BOX

DISQUS is the best COMMENTING PLATFORM which gives total freedom to all of your visitors no matter where they came from ( facebook ,twitter, online search or from where ever). they can give there views with having a identity. DISQUS COMMENT BOX also gives your blog a great look and improve your blogs interface .Disqus lets your visitor to comment as by using any of following ids.

So all the visitors will have lots of option to choose from and will have there unique identity. 
they can also use OPENID or GUEST id to submit there views if they want to..!

NOW HOW TO ENABLE DISQUS COMMENT BOX IN YOUR BLOG:-
It will only gonna take 4-5mins to setup DISQUS COMMENT BOX in your blog

  • First of all goto disqus and register your blog click here to register your blog.
THIS WINDOW WILL OPEN
Fill all the required  fields and click on ' CONTINUE '
  • After clicking " CONTINUE " the following window will open . in this window simply click on " continue "(at bottom of the window). no need to fill any field. just click on "CONTINUE"
IN THIS WIDOW NO NEED TO FILL ANYTHING SIMPLY CLICK ON " CONTINUE


  • After clicking on " Continue " following window will show up, in this window click on "BLOGGER ".


CLICK ON " BLOGGER "


  • After clicking on " Blogger " following window will show up, in this window simply click on the tab under 3rd option which says " Add site " your_site_name" to blogger.
click on the tab under 3rd option which says " Add site " your_site_name" to blogger.


  • Now  select a blog in which you want to add DISQUS COMMENT BOX . fill the title and click on " add widget ". 

IN THIS WINDOW CLICK ON " Add Widget "


    • Now you can see DISQUS COMMENT BOX  in your layout and as well as in your blog..!

    • To check it you have to click on a particular post. in you blog...! !! :-)

    How to get google adsense account for free without a website or blog


    Google AdSense is one of the most innovative  way to make money online by displaying ads on your web pages like :- blog, website , forum, articles. Google AdSense was launched on June 18, 2003 and today there are millions of Google AdSense publishers.Google has two tools Google  AdSense and Google Adwords from these two tools Google generates most of revenue . Google easily approves AdSense accounts in most of countries but in few countries Google hardly approve AdSense applications.The reason may be one or other .  If you are having a website, then Then its good but if you don't have one , no problem you can still create a adsense account for free .

    Actually there is no trick behind creating an Adsense account. Many people make fool by creating AdSense account via other websites and then try to sell these accounts which is wrong . Other websites mean those websites who have revenue sharing system Like Blogger, flixya, IndyaRocks, Hubpages. Following are 5websites which allows you to create an AdSense account. You don't have to pay them for this, just create an account at any of following sites and you can apply for your AdSense account from there.

     5 Free sites other than blogger to get Google adsense account:-
    • 1. Flixya.com

    Flixya is a great  way to create an AdSense account for free.

    Flixya is a website to share pictures, videos and blogs and it is powered by Google AdSense itself so there are higher chances of AdSense account approval. Simply signup for an account at Flixya, upload 10 ore more pictures, create a blog and apply for an AdSense account.
    Link: http://www.flixya.com


    • 2. Hubpages.com

    Hubpages is a website where people post their articles and get paid out of it.

    Hubpages is a revenue sharing website where you can share your article on any subject and they will pay you for this. You can apply for an AdSense account via their Revenue share system.
    Link: http://www.hubpages.com


    • 3. Docstoc

    Its really simple and easy to create an AdSense via Docstoc.

    Go to Docstoc, upload few documents there such as txt, doc or presentation files. But make sure those files contain some well written form. Simply go to Docstoc, create an account, upload few docs and apply for an AdSense account.
    Link: http://www.docstoc.com/
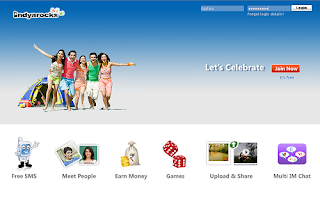

    • 4. IndyaRocks

    This is a social network almost like Facebook. Here you can make friends, update your status, share pictures etc.

    First of all, create an account there and complete your profile. Write 5 blogs at least and when you have done with it simply apply for an Adsense account application.
    Link: http://www.indyarocks.com/


    • 5. Webanswers

    Webanswers.com is a Q ,A site just like Yahoo! Answers where you can ask questions or answer others question on various topics.
    Here is the step by step tutorial how to get Google adsense account approved.


    • First of all open a website webanswers(.)com and Sign up
    • This site is just like other knowledge sharing sites like yahoo answers or wiki answers.You just have to answer atleast 10 questions.
    • After some time you will get an Email by Google in which they would ask you to open adsense account.
    • Fulfill all the details with your correct information.

    Link: http://www.webanswers.com/

    LG secret codes


    *#06#                ->  To display the IMEI Number of the mobile.
    2945*#01*#        ->  Secret menu for LG.
    2945#*#             ->  Test mode.
    *8375#               ->  Use to display the mobile software version.
    *#07#                 ->  To display the SW and IMEI Number(LG 510)
    2945#*70001#     ->  Simlock menu (LG 7020, 7010)
    2947#*                ->  Simlock menu (LG 500, 600)
    2945#*5101#       ->  Simlock menu (LG 510W, 5200)
    1945#*5101#       ->  Simlock menu (LG B1200)
    637664#*#           ->  Test Menu 8330.
    49857465454#     ->  Test Menu 8180 V10a.
    492662464663#   ->  Test Menu 8180 V11a.
    47328545454#     ->  Test Menu 8130-8138.
    277634#*#           ->  Test Menu 8110-8120
    *8375#                ->  OS version (LG B1200)
    ##2342                -> Apply to resets the set advanced settings.
    ##786                 ->  Used to reset the mobile memory and life timer.
    ##889                 ->  To Enable the TTY.
    * 6861 #              ->  To recount checksum.

    What is facebook timeline how to create facebook timeline profile and a cool timeline profile cover


    What is facebook timeline:-
    Facebook Timeline, was introduced by facebook CEO Mark Zuckerberg  in September,2011, Timeline is a complete rethinking off a user's profile page and how it should look. Time line uses Facebook users existing data like pics, status, friends etc.. and represents that data in more meaningful way.

    Facebook users can now easily scroll back to previous years and see what they were saying and what they were doing its like time travel (going to past).its a complete innovation and a huge change and really make sharing like real life(as g+ says) ..! !!

    How to get Facebook timeline profile:-
    • After logging in click here or visit:- http://www.facebook.com/about/timeline
    • Now click on " Get Timeline " 
    Click on:- Get Timeline

    • Now you well be redirected to your facebook profile and you can feel the change.
    • Now click on " Publish Now " or (There's a seven-day review period. During the seven-day review period, the  user will be able to publish it at any point of  time.(either just after getting profile or  If you chooses to wait, it will automatically go live after the week is up.)
    Click on:- Publish Now
    •  Now all set your Timeline Profile is live and visible to all the facebook users..!
    Now how to create a Cool Cover to your Timeline profile:-
     Timeline Profile cover represents your whole profile ..! its like a cover of a book or album..!so it has to be impressive..!
    so how to make impressive cover ..and what is impressive ,,, how about adding your all friends to your Cover photo Like below

      How to create a cover like this one:-

    •  Now go to creaposter or visit:- https://apps.facebook.com/creaposter/ (it will merge all of your friends profile picture and create a impressive image)
    • Click "  Allow "
    Click on:- Allow
    •  Now within less then 15sec you will see below screen . In this screen click on SAVE & SHARE
    click on:- SAVE & SHARE
    Now click on add cover


    •   Now come back to your timeline profile and click on add cover>Choose from Photos..
    click on:- add cover>Choose from Photos.

    • Now Select the picture created by Creaposter. 

    • Now Clik on " Save Changes "
      Clik on:- Save Changes
    • thxx.. don't forget to comment like and share..! !! :-)   

    Also check:- How to create stand out timeline cover

      How to add your blog to your facebook page


      This post is about how you can add your blog to your facebook page using a facebook app called " networked blogs ". Networked blog is a facebook app which is used by many blogger's to permote there blog at facebook. When you will add your blog to your fan page using networked blog it will automatically shared in you page under your Blog tab.

      Now how you can add your blog to your facebook page:-

      • After clicking on " Register a Blog " This window will open now copy your blog link and paste it in the box .


      • Now fill all the required information

        After filling all the required info click on:- Next


      • After clicking next you will be asked whether you author of the blog or not? click on YES

      • Then you will be asked for confirmation (confirmation for that you are the owner of blog or website)for confirmation you have two options click on 2nd option . 
        • Ask friends to confirm you( instruction about 1st option mentioned in video at bottom of this post)
        • Or, install the widget ( CLICK ON THIS OPTION, RECOMMENDED,EASY TO FOLLOW )
      Click on:- Or, install the widget

      • Copy the Option 1 code then login to you blog if not already->goto layout->add a gadget->html. and paste code->save arragements   


      • Now come back to Networked blog window and click on Verify Now


      • Now goto your FACEBOOK FAN PAGE where you added the BLOG and click on Blog->Edit tab->and tick your blog->click on save changes


      How to add you blog to facebook page:-


      How to create your own keyboard shourcut

      Are there folders or applications you need a lot or use them havily?  Do you know that you can create your own keyboard shortcut to quickly access that file,folder or application by creating a keyboard shortcut.
      NOTE:-This will only work for shortcuts located on your desktop
      Steps to create your own keyboard shortcut:-
      • First you need to create an actual desktop shortcut for the application thats shorcut you want to create.
      • Go to application whose keyboard shortcut your want to create
      • Right-click on the application and select > Create Shortcut from the context menu. Make sure the shortcut sits on your desktop.

      • Now goto desktop right-click the shortcut created and select > Properties. You should see a line that says “Shortcut Key: ”. Click that line and then click a letter ony our keyboard, for example F. A shortcut will be created, in this example [Ctrl] + [alt] + [F].

      • And there you go, now you have your own personal shortcut key.

      Javascript to edit any website like facebook or google funny trick


      This is very cool javascript which can be used to edit the content of any website like facebook or google you just have to copy javascript on your address bar and hit enter


      This is how it works:-

      Open any website in Google Chrome, or in Opera and enter the below code to the address bar of the browser.

      javascript:document.body.contentEditable='true'; document.designMode='on'; void 0

      •and press enter

      Note :- while using This code in google chrome it may not work just by pasting it on address bar you have to add " javascript: " in the beginning manually .


        • In chrome it will look like This when you paste it:-

      document.body.contentEditable='true'; document.designMode='on'; void 0


        • then u have to add " javascript: " without "" in beginning of code so it will look like this:-

      javascript:document.body.contentEditable='true'; document.designMode='on'; void 0


      •and hit enter
      •Now u can edit any website


      Here's one more script to make images float on any website just copy and paste it into address bar:-

      javascript:R=0; x1=.1; y1=.05; x2=.25; y2=.24; x3=1.6; y3=.24; x4=300; y4=200; x5=300; y5=200; DI=document.getElementsByTagName("img"); DIL=DI.length; function A(){for(i=0; i-DIL; i++){DIS=DI[ i ].style; DIS.position='absolute'; DIS.left=(Math.sin(R*x1+i*x2+x3)*x4+x5)+"px"; DIS.top=(Math.cos(R*y1+i*y2+y3)*y4+y5)+"px"}R++}setInterval('A()',5); void(0);

      Note:-works well with firefox:-4 , Opera , in chrome you have to add:- javascript: in the beginning manually.


      How to sign up multiple times to a website with one/same gmail account

      Sometimes you want to create multiple accounts in a website but you require different email id. In this very easy and simlple trick i'll share how you can create multiple accounts in some websites with only one gmail account. The basic logic behind the trick is some websites treats .(dot) as different email id but gmail treats them same.because gmail ignores .(dot) from your email id
       for examle:-
      computertrickscorner@gmail.com      
      computer.trickscorner@gmail.com     
      computer.tricks.corner@gmail.com    
      com.pu.tertr.icksc.o.r.ner@gmail.com


      if i'll use any of these email id's to sign in to my gmail  account gmail will let me in to the account computertrickscorner@gmail.com because gmail ignores .'s(dots) in your id. but many websites(not facebook)treats them as different id and you can access multiple accounts in a website through one email id.

      This trick is only for gmail accounts and will not work on yahoo and hotmail etc. To know how to access multiple gmail accounts at same time on same browser click here

      How to add a music palyer to blogger blog


      MusicPlaylistView Profile
      Create a playlist at MixPod.com


      Do u like music.. ! !! i'm sure you do, who don't love it.,so do your visitors . ok, why don't add  add  music player in your blog? In this post I will explain how to add music player in your  blog. . The music player i'm about to explain is  MixPod. With this service you will be able to show your music player in your blog.
       Let's start:-

      •  Go to MixPod  Click Sign Up in the top-right


      •  Now fill all the info

        • Fill yourYour Email:
        • New Password:
        • Re-type Password:
        • Birthdate:
        • I am:(Gender)
        • Location:(Country)
      • After filling all the info click on Sign Up


      • Now   Just follow 3 steps: -Add Music (Adding Playlist), -Customize (Skins, Colors and Styles, Settings), -Save Playlist
        • 1.click on:- 1. Add Music
          • Search for the songs you want to add to the playlist
          • After searching click on + sign to select the song
          • You can add up to 200 songs per playlist


        •  2. Customize  After selecting songs for your playlist click on  to edit your player's colors & styles  at Music Playlist Skins. 


        •  If you done all of it, click SAVE (get code)


      •  In the left options, click Blogger


      • Copy the code, then Paste on your HTML Widget or in a post in html mode. Save! Or follow steps below code box.


      •  Done..! !! :-)